Disclaimer: this guide will use Vapoursynth in place of the official name VapourSynth, because I like it better.
Hello and welcome to EoE’s Pro Vapoursynth Tutorial, where you’ll learn to write bad good code and turn your disgusting crappy DVD rips into beautiful, crappy DVD rips.
So what first? Well, to begin with, we need some prerequisites. Easiest way to get everything is to follow the Vapourysnth Installation Instructions, but in short, all you really need is Python (Vapoursynth currently uses Python 3.8.x) and then just run the Vapoursynth Installer. Ta da! You’ve now installed Vapoursynth.
But wait, what did I just install?
VapourSynth is an application for video manipulation. Or a plugin. Or a library. It’s hard to tell because it has a core library written in C++ and a Python module to allow video scripts to be created. - vapoursynth.com
The way I like to think about Vapoursynth, is that it’s a library for manipulating video, where the easiest way to access it’s functions is via the Python module. Vapoursynth itself just provides the framework for this, and then plugins for it allow you to do the filtering. It’s a powerful tool, inspired by Avisynth, with a diverse amount of plugins written for it. I use Vapoursynth to perform operations like denoising, dehaloing, deinterlacing, etc. on videos that I’m working on.
Okay, so how do I use it?
Vapoursynth doesn’t have a ui, being a library, instead you usually write Python code that uses the Vapoursynth library to do your processing. Of course, you’ll need to check your output all the time, to make sure that the changes you are making look like you want them to, so we’re going to need another app to do this. The two major options would be Vapoursynth Editor (which I will from now call vsedit), a standalone Vapoursynth script editor with a built in preview window and a few other neat features, or the more bare Vapoursynth Preview, a Python module which you’d usually run from within something like Visual Studio Code’s terminal. I myself opt for the second, due to how much newer, and better it works with my workflow, though the “all-in-oneness” of vsedit means that a beginner might find it easier to use. I’m going to focus on vsedit here, due to it’s slight simplicity in comparison, however the information here will mostly work for both.
Your first script
We’ve now installed Vapoursynth, a way to edit Python scripts for it, and a way to preview those scripts. Technically we’re still missing a way to output our finished videos, but we’ll get to that later. Let’s now write your first script! Start by opening up vsedit, and get a quick feel for the interface: it’s pretty simple, so there’s not much to mention here.

In the center, we’ve got the main text editor, which supports some (very basic) highlighting and completion, and then at the bottom, an output log. Check out Edit -> Settings for the few configuration options available. Lets get onto writing some code.
To start with, lets go over what’s already in the text box:
import vapoursynth as vs
core = vs.get_core()
The first line imports the Python vapoursynth package, and gives it the alias vs so we don’t have to write out vapoursynth every time we want to use something from it.
importing in Python allows that script to access code from other scripts, so here we’re just grabbing the stuff we need to use vapoursynth via Python.
The second line gets a core object from our newly imported vapoursynth library. The core object is what performs most of our Vapoursynth operations, so you’ll always need this. Note that this is technically deprecated, and core = vs.core should be used instead. We could call this anything we wanted, like scradbadlol = vs.core, however this is arguably less readable, and so calling it core makes the most sense.
Alright, so we’ve gotten our script ready for some Vapoursynth, though we aren’t actually doing anything yet, so let’s do something. Add the following lines into your script…
my_clip = core.std.BlankClip(width=1920, height=1080, length=1000, fpsnum=24, color=[255, 0, 0])
my_clip.set_output()
On the first line, we call a function called BlankClip from the std namespace, accessed by our core object. This function is fairly self explanatory: it generates a new empty clip. Clips in Vapoursynth represent collections of individual frames, with a rate at which they can be played back: a video. All filtering work is done via these clips. We’ve also passed the BlankClip function a few parameters, telling it we’d like our frames to be 1920x1080 pixels (i.e. 1080p), there to be 1000 frames in total, the playback rate to be 24fps and the frames to all be rgb(255, 0, 0), pure red. This function gives us back our new clip, and we store it in the my_clip variable.
On the second line, we take our my_clip variable (which we just assigned to be our red video), and flag that to be our output.
Now we’ve got a fingers crossed working Vapoursynth script which we can preview. A quick f5 press bring up a new window with… A 1080p 24fps 1000 frame long red video!
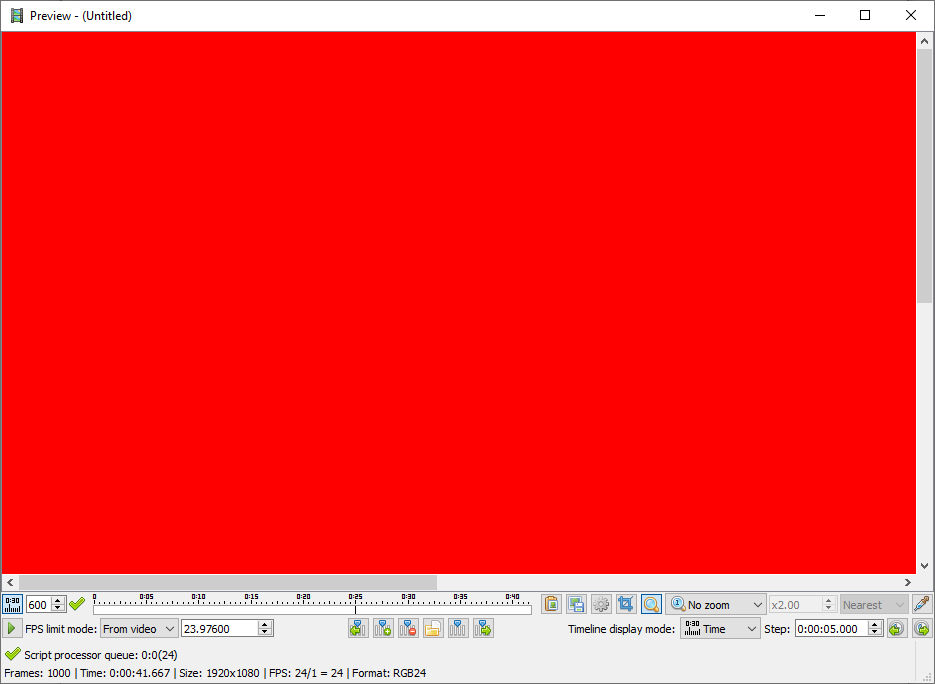
Great! While we’re here, lets familiarise ourselves with the preview window. Our output frames are displayed in the middle, and a toolbar at the bottom. The toolbar, from left to right, contains a play button, current frame number, timeline, zoom mode/ratio controls and an eyedropper tool, along with a few other buttons. A lot of these are self explanatory, and for those that aren’t, it’d probably more fun for you to click on them and find out what they all do yourself. At the very bottom, is information about our output clip overall.
Let’s save our fabulous progress before your laptop battery runs out / there’s a powercut. Close the preview window, then either Ctrl+S or click File > Save script. Vapoursynth scripts use the .vpy extension by convension, so call your script something memorable.vpy. I’ve opted for first_script.vpy.
We did it!
Congratulations, you’ve written your first Vapoursynth script! It doesn’t do all that much, but we’ve gotten to grips with the basics of how Vapoursynth works, how to set up an environment to write its scripts, and familiarised ourselves with the clunky but cozy (ish) vsedit ui. Going forwards, we’ll look at importing, and filtering our own video clips, as well as how to export the output. If you’re still confused about something, I’ve done a bad job; please shout at me on Discord (End of Eternity#6292).
Cheers, EoE
Scripts written in this post: